Using Apache DS, Part 2
2007-09-28
Now that we have the LDAP server running, we need to be able to CRUD the data within the LDAP server. ApacheDS does not have an integrated GUI but it does have a companion tool, Apache Directory Studio, which can connect to the server and edit its data.
-
Download and install Studio. Start it. It’s Eclipse-based so Java developers should be familiar with its GUI.
-
Go to LDAP | New Connection… and create a connection:
- Hostname: localhost
- Port: 10389
- Bind DN: uid=admin,ou=system
- Bind password: secret
Leave everything else as default. Click OK.
- You should now see Studio display a tree-structure on the left. This is the content in your LDAP server.
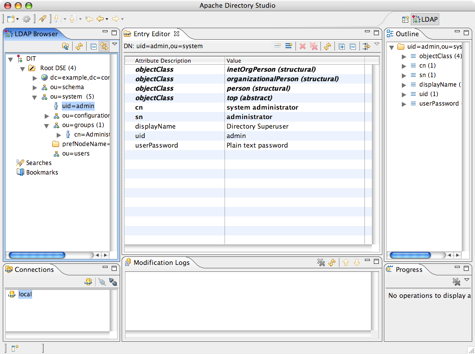
- Now you’ll want to import the data specific to your organization or product. First you need to create a parition which holds your data. In the screenshot above, “dc=example,dc=com” is a partition for example.com. Creating a partition is not as easy as it could be but basically involves cutting and pasting a block of XML and changing it in 3 spots to fit your needs.
- With our own partition we can import our data. You can use Studio to create the data but it’s a manual process. Instead you should create an LDIF file which contains your data. All you need to do is create a DS_HOME/ldif directory and place your LDIF files in this directory. ApacheDS will load the LDIF files upon startup. Do note that LDIF is not an easy format to work with. It’s another example where you will want to schedule some time to play with it in order to understand its quirks and foibles. Here’s a simple Fiveruns LDIF datafile which creates an organizational unit and a user within a “FiveRuns” partition.